Background
Ghost is a sleek, open-source blogging platform known for its modern design and ease of use. While Ghost offers paid hosting, this guide shows you how to self-host it for free using Google Cloud's VM instance. Whether you're a beginner or tech-savvy, I will walk you through these steps to get your blog up and running.
- Setup a VM instance on Google Cloud platform
- Setup a custom domain name with Cloudflare
- Host Ghost on an Ubuntu server
Let's get started!
Setup
First, make sure you create an account at Google's Cloud platform. When setting up your profile you'll need to fill in billing information and addresses. Don't worry they won't charge your card, and if you set everything up properly in this article they also won't charge you any hidden fees.
Looking at Google's offerings, we can get the following for free:
- 1 non-preemptible
e2-microVM instance per month in one of the following US regions:- Oregon:
us-west1 - Iowa:
us-central1 - South Carolina:
us-east1
- Oregon:
- 30 GB-months standard persistent disk
- 1 GB of outbound data transfer from North America to all region destinations (excluding China and Australia) per month
Looks like that's more than enough to get a Ghost blog hosted.
Set a budget
Before we do anything else, we'll setup a budget profile and notifications, so that you get notified in case Google decides you need to pay up.
To set up a budget, go to Billing -> Your project -> Budget & Alerts and select "Create Budget". Now, create a monthly budget for a maximum spend. I recommend using a low amount around €5 (or your currency equivalent). This is because you shouldn't be spending anything.
Create a VM
We want to create something to actually host our site on, we'll be using a Google Cloud Compute Engine Virtual Machine.
You want to set up a new project and head to the sidebar -> Compute Engine -> VM Instances. Here, click "Create Instance".
- Name: for your VM instance, something like "ghost" or "ghost-blog".
- Region: In my case, I choose
us-east1because it's geographically nearest to me, and in the free tier. set zone toAny. - Machine Configuration: select
E2. UnderMachine Type, selecte2-micro. - Expand the options
VM Provisional model advanced settingsand changeOn host maintenancetoMigrate VM Instance. - Boot disk: Change
- Operating system to
Ubuntu - Version to
22.04 LTS for x86/64, amd64. - Boot disk type to
Standard persistent disk. - Lastly, change the
Sizeto 30 GB.
- Operating system to
Now we should have our VM setup, we can test it using Google's built in SSH tool.
Test with SSH
To see if everything works properly, click the SSH button on the right. It should open a popup window, showing something similar to your_name@ghost.

Setup Memory Swap
Since Ghost requires at least 1GB of RAM to install, and our VM has exactly that, it will freeze when trying to install (trust me, I tried). To prevent this from happening we'll add a "swapfile" which is basically a part of the persistent storage acting as a substitution for memory when it runs out.
Creating the swap:
# Allocate a 1GB swap file
sudo fallocate -l 1G /swapfile

# Set the correct permissions
sudo chmod 600 /swapfile

# Format the file as swap space
sudo mkswap /swapfile

# Enable the swap file
sudo swapon /swapfile

# Verify the swap file is active
sudo swapon --show
free -h
We want to make the swapfile persistent (for reboots), enter the following:
sudo nano /etc/fstab
And add this line at the bottom of the file.
/swapfile swap swap defaults 0 0
Hit Ctrl+X to exit and Y to save the file.
Setup Custom Domain
Now there's two ways to go for your custom domain. First, you could choose to use a free domain name to go fully free, OR, better, you could choose to buy a domain name and use that instead.
In this case, we'll register a domain with Cloudflare, since they offer domain registration without markup pricing! Feel free to use any other service.
You can register for a domain at Cloudflare here.
After you've registered your domain, head over to your account, click on the domain, and go to DNS settings. Click Add Record and fill in the values. Fill in @ for name, as you want to use your full domain name for your blog. Fill in your VM's IPv4 address in the next box, which can be found in your Google Cloud Platform console.


Now you're set to install Ghost.
Install Dependencies
Now that we have our VM and domain set up, we will use the (copied over) official installation instructions from Ghost.
In your VM instances window in GCP, open an SSH instance. You'll be logged in as your Google user. We will first update Ubuntu.
# Update package lists
sudo apt-get update

# Update installed packages
sudo apt-get upgrade
Install NGINX
Ghost uses an NGINX server and the SSL configuration requires NGINX 1.9.5 or higher.
# Install NGINX
sudo apt-get install nginx
If ufw was activated, the firewall allows HTTP and HTTPS connections. Open Firewall:
sudo ufw allow 'Nginx Full'Install MySQL
Next, you’ll need to install MySQL to be used as the production database.
# Install MySQL
sudo apt-get install mysql-server
On newer versions of Ubuntu, the root user created when you install MySQL will by default be configured to use socket-based authentication, meaning that only the root Unix user will be able to authenticate. Ghost does not support this kind of authentication, so you must change the root MySQL user to have a password. Run these commands to make the root user have a password:
# Enter mysql
sudo mysql
# Update permissions
ALTER USER 'root'@'localhost' IDENTIFIED WITH 'mysql_native_password' BY '<your-new-root-password>';
# Reread permissions
FLUSH PRIVILEGES;
# exit mysql
exit
Install Node.js
You will need to have a supported version of Node installed system-wide in the manner described below. If you have a different setup, you may encounter problems.
# Download and import the Nodesource GPG key
sudo apt-get update
sudo apt-get install -y ca-certificates curl gnupg
sudo mkdir -p /etc/apt/keyrings
curl -fsSL https://deb.nodesource.com/gpgkey/nodesource-repo.gpg.key | sudo gpg --dearmor -o /etc/apt/keyrings/nodesource.gpg

# Create deb repository
NODE_MAJOR=18 # Use a supported version
echo "deb [signed-by=/etc/apt/keyrings/nodesource.gpg] https://deb.nodesource.com/node_$NODE_MAJOR.x nodistro main" | sudo tee /etc/apt/sources.list.d/nodesource.list

# Run update and install
sudo apt-get update
sudo apt-get install nodejs -y
Install Ghost-CLI
Ghost-CLI is a commandline tool to help you get Ghost installed and configured for use, quickly and easily. Te npm module can be installed with npm or yarn.
sudo npm install ghost-cli@latest -g
Once installed, you can always run ghost help to see a list of available commands.
Install Ghost
Once your server is correctly setup and ghost-cli is installed, you can install Ghost itself. The following steps are the recommended setup. If you need more fine-grained control, the CLI has flags and options that allow you to break down and customise the install steps.
Create a directory
Ghost must be installed in its own directory, with a proper owner and permissions.
# Create directory: Change `sitename` to whatever you like
sudo mkdir -p /var/www/sitename

# Set directory owner: Replace <user> with the name of your user
sudo chown <user>:<user> /var/www/sitename

# Set the correct permissions
sudo chmod 775 /var/www/sitename

# Then navigate into it
cd /var/www/sitename
Run the install process
Now we install Ghost with one final command.
ghost installDuring install, the CLI will ask a number of questions to configure your site.
Blog URL
Enter the exact URL your publication will be available at and include the protocol for HTTP or HTTPS. For example, https://example.com. If you use HTTPS, Ghost-CLI will offer to set up SSL for you. Using IP addresses will cause errors.
MySQL hostname
This determines where your MySQL database can be accessed from. When MySQL is installed on the same server, use localhost (press Enter to use the default value). If MySQL is installed on another server, enter the name manually.
MySQL username / password
If you already have an existing MySQL database, enter the the username. Otherwise, enter root. Then supply the password for your user.
Ghost database name
Enter the name of your database. It will be automatically set up for you, unless you’re using a non-root MySQL user/pass. In that case the database must already exist and have the correct permissions.
Set up a ghost MySQL user?(Recommended)
If you provided your root MySQL user, Ghost-CLI can create a custom MySQL user that can only access/edit your new Ghost database and nothing else.
Set up NGINX?(Recommended)
Sets NGINX up automatically enabling your site to be viewed by the outside world. Setting up NGINX manually is possible, but why would you choose a hard life?
Set up SSL?(Recommended)
If you used an https Blog URL and have already pointed your domain to the right place, Ghost-CLI can automatically set up SSL for you using Let’s Encrypt. Alternatively you do this later by running ghost setup ssl at any time.
SSL certification setup requires an email address so that you can be kept informed if there is any issue with your certificate, including during renewal.
Set up systemd?(Recommended)
systemd is the recommended process manager tool to keep Ghost running smoothly. We recommend choosing yes but it’s possible to set up your own process management.
Start Ghost?
Choosing yes runs Ghost, and makes your site work.
Test your setup
Go to your domain that you hosted everything on, and it should show an empty Ghost website.
Go to <yourdomain>.com/ghost, and you should be greeted with a login page where you can configure your owner account.
Congrats! You now have your very own free hosted Ghost CMS blog on Google Cloud Platform.
Questions
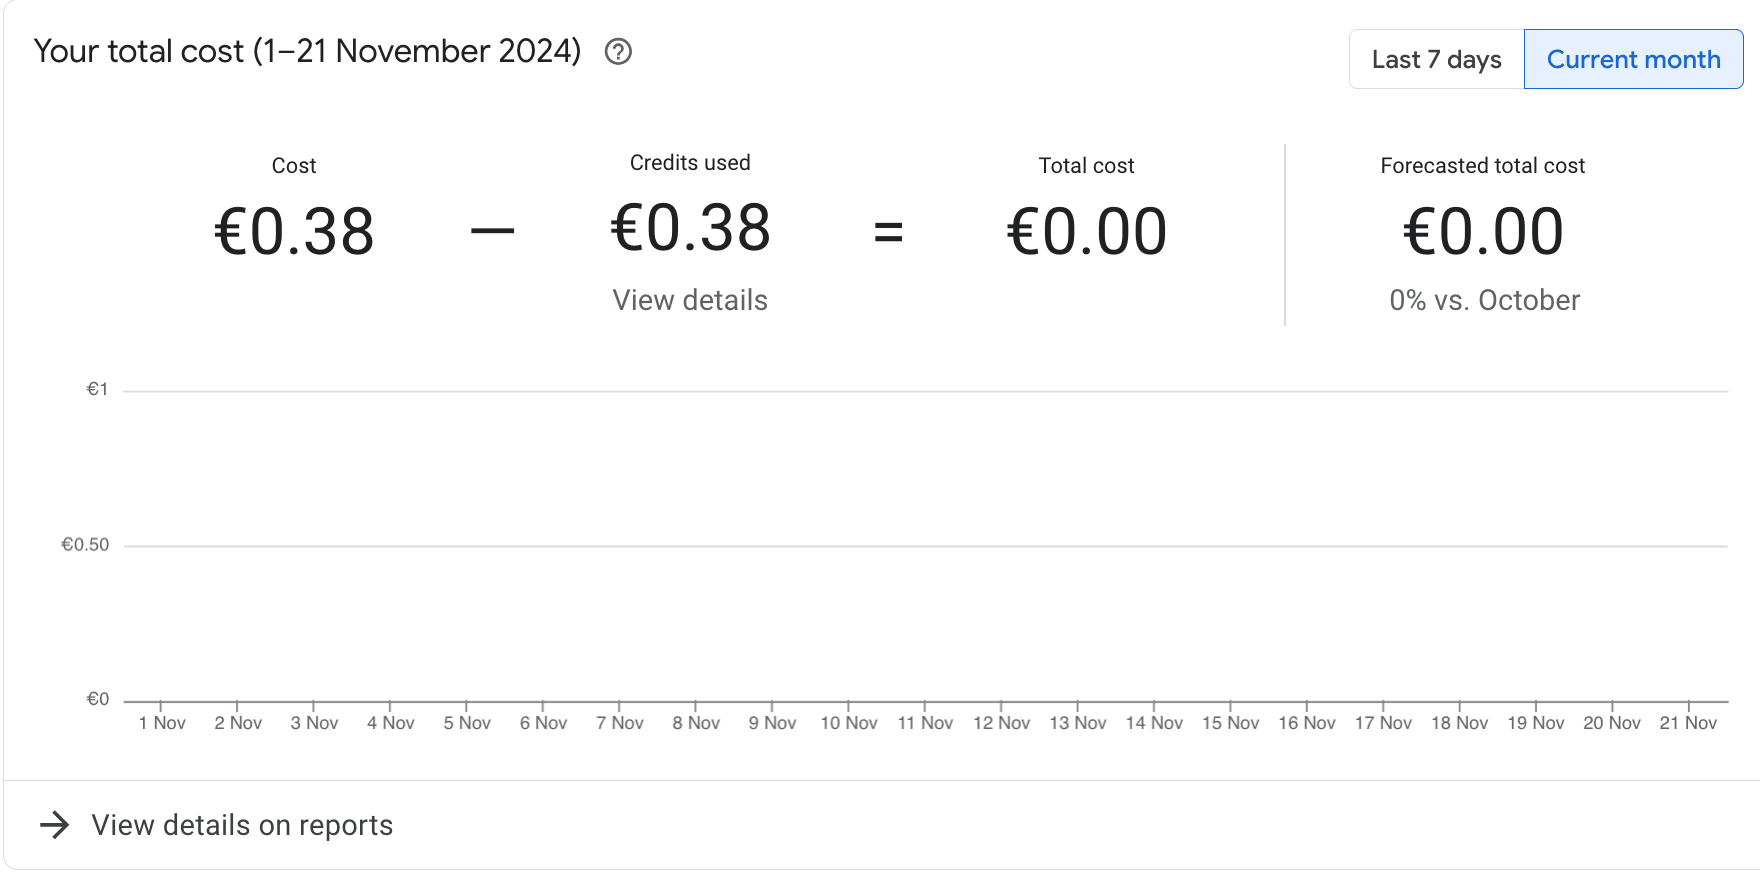
Why does Google say I'm using credits?
When looking at the billing overview, it appears Google is using our credits 😠.

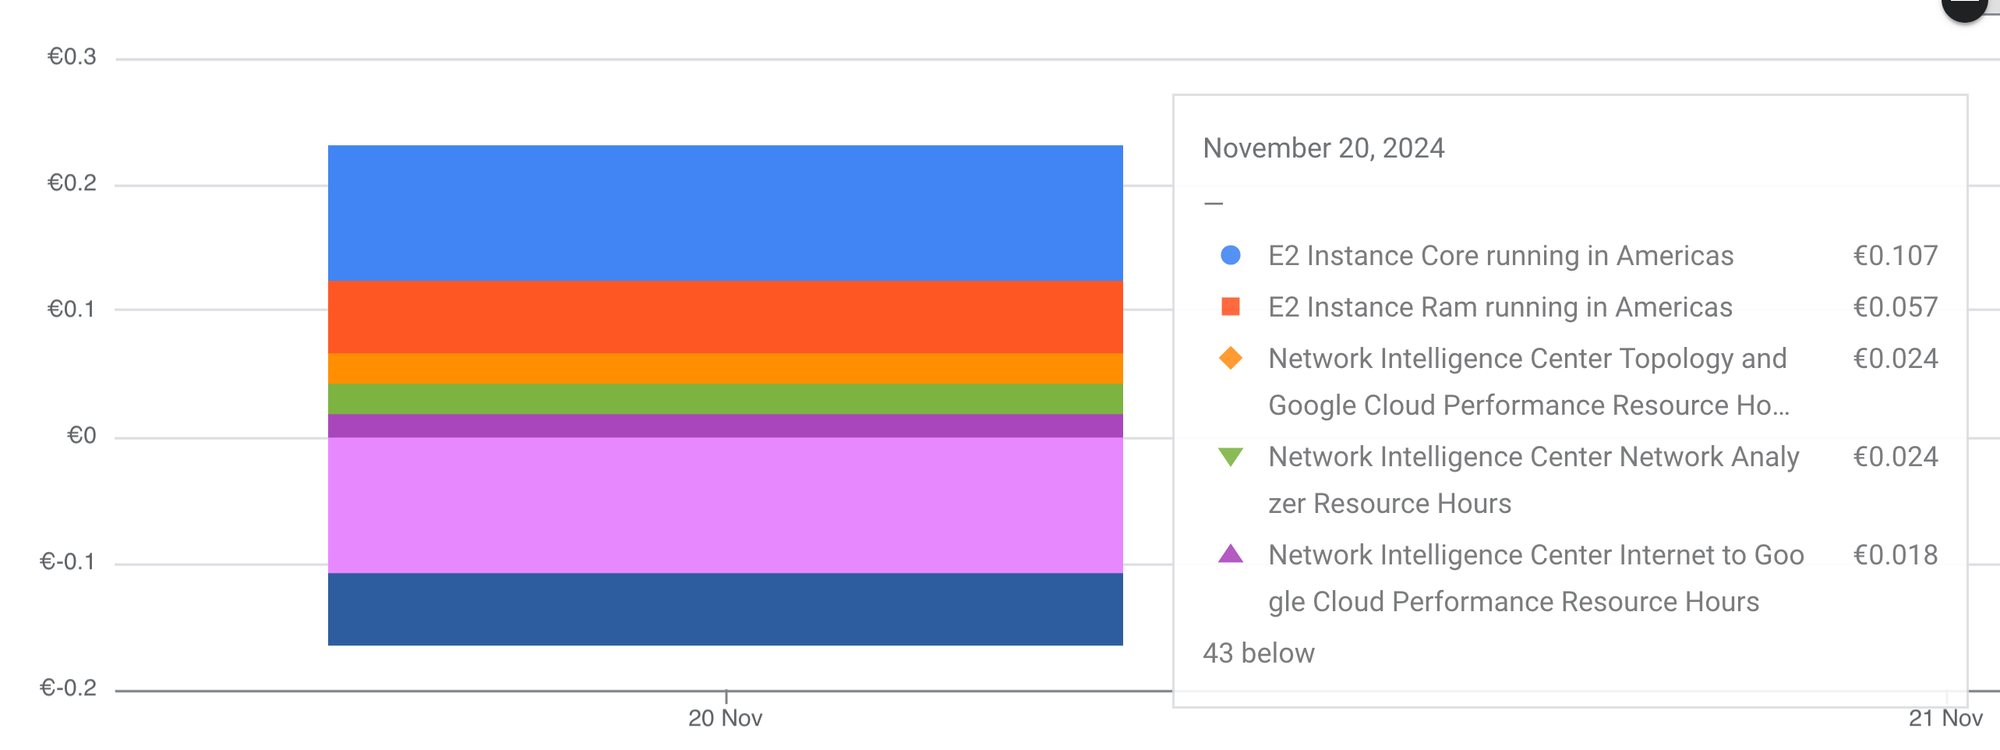
Looking in the graph below, you can see the light blue and orange cancel out with the pink and dark blue. However there appear to be some extra costs associated with "Network Intelligence Center".

Worry not! Google describes this clearly on their site:
The three Network Intelligence Center modules (Network Topology, Network Analyzer, and Performance Dashboard) are available to all users for 100% discount. The cost of these modules will be shown in your billing details, but you will not be charged for them. Any changes to the discount structure will be effective with a 90 days prior notice. The updates to the discount rates will appear in your billing information only after you choose to re-enable the modules.
So even though it looks like our credits are being used, they're not.
